Why Plumbing Fixture Installation Skills Can Save You Money and Stress
Learning to perform your own plumbing fixture installation is a rewarding DIY skill. Whether upgrading a leaky faucet or replacing an old toilet, you can save hundreds on labor costs and gain the confidence to handle future plumbing needs.
Quick Answer for Plumbing Fixture Installation:
- Turn off water supply – Always shut off water at the fixture or main line.
- Remove old fixture – Disconnect supply lines and mounting hardware.
- Clean and prepare – Remove old sealant and clean surfaces thoroughly.
- Install new fixture – Follow manufacturer instructions for mounting.
- Connect supply lines – Use proper fittings and check for leaks.
- Test thoroughly – Run water and check all connections.
With the right knowledge and tools, many fixture installations are well within the reach of motivated homeowners. Installing your own fixtures isn’t just about saving money—it’s about taking control of your home’s maintenance and the satisfaction of a job well done.
Common fixtures you can install yourself include:
- Kitchen and bathroom faucets
- Toilets and bidets
- Showerheads and tub faucets
- Garbage disposals
- Basic sink installations
Of course, knowing your limits is crucial. Some projects require professional expertise, especially those involving major pipe modifications or complex valve systems.
Before You Begin: Gearing Up for Success
Successful plumbing fixture installation starts with proper preparation. Taking the time to gather your tools and understand the project upfront will prevent frustration and extra trips to the hardware store.
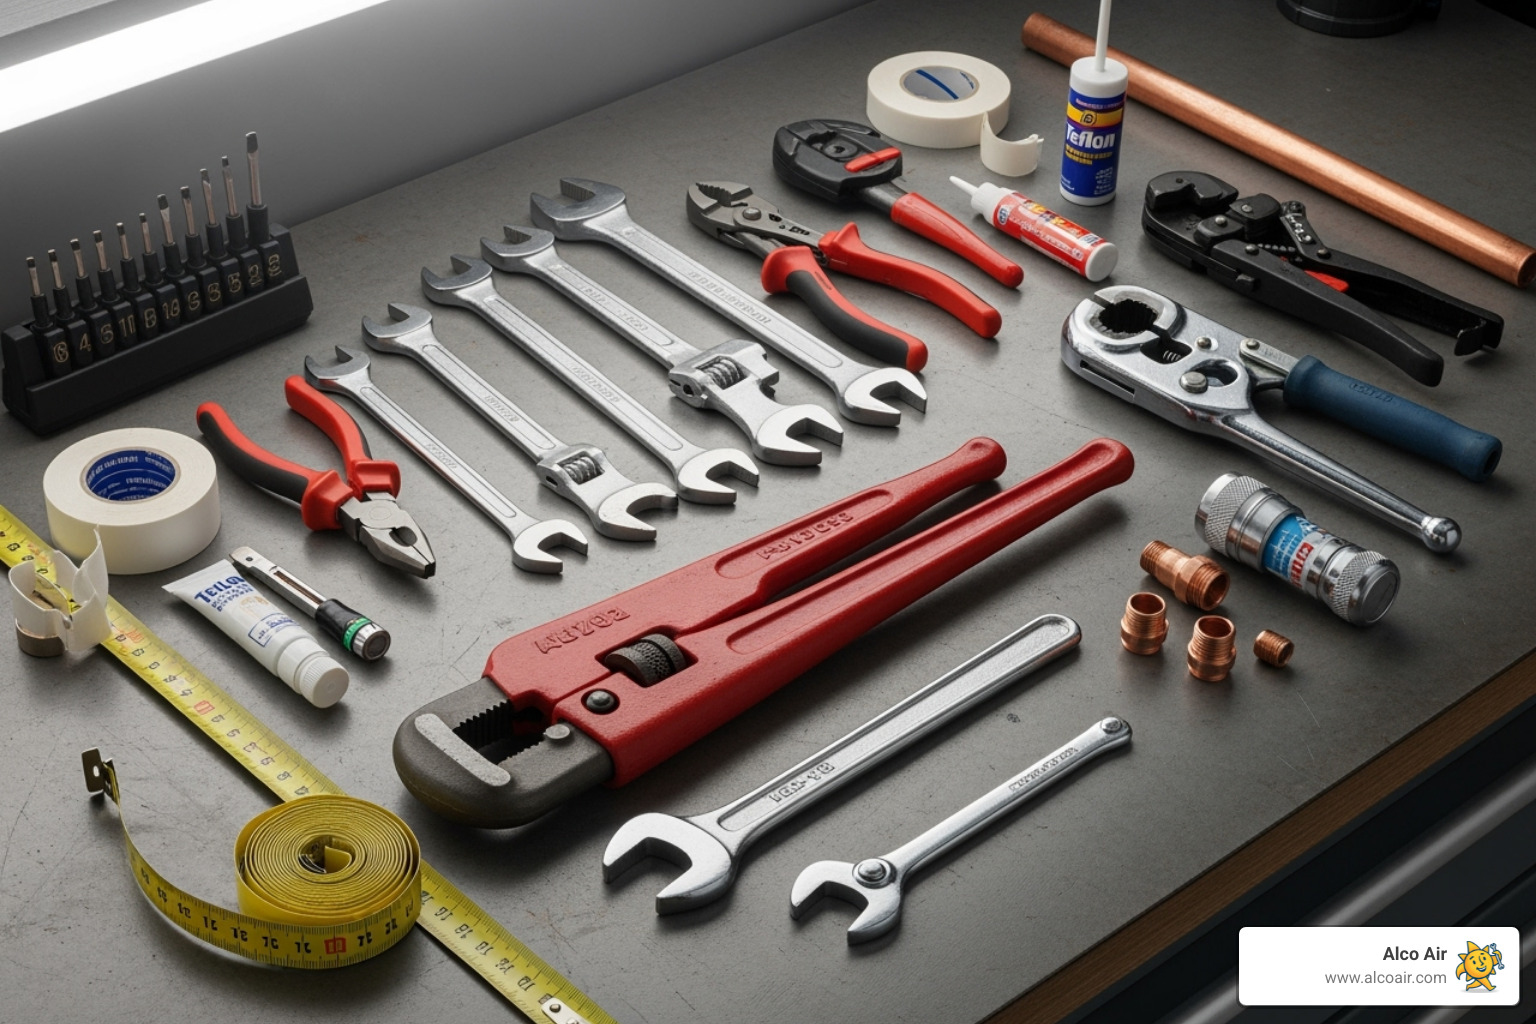
Essential Tools and Materials for Plumbing Fixture Installation
An adjustable wrench is your most versatile tool, but a basin wrench is invaluable for reaching fasteners in the tight spaces behind a sink. Plumber’s putty creates watertight seals around drains, while Teflon tape wraps around threaded connections to prevent leaks (always wrap it clockwise). For sealing around the base of fixtures, choose a flexible, waterproof silicone caulk.
Your toolkit should also include:
- A bucket and towels for catching residual water.
- Screwdrivers (Phillips and flathead).
- A utility knife for cutting old caulk.
- Various pliers for gripping.
- Safety glasses and gloves to protect yourself.
- A flashlight or headlamp for working in dark cabinets.
Having everything ready beforehand turns a potentially frustrating job into a satisfying accomplishment.
Choosing Your Fixture: Types, Materials, and Trends
When selecting a fixture, looks matter, but compatibility is everything. You need a fixture that works with your existing plumbing setup.
- Faucets: Match your new faucet to your sink’s hole configuration. A single-handle faucet won’t fit a widespread three-hole sink without a deck plate.
- Toilets: One-piece models are sleek and easy to clean, while two-piece toilets are often more budget-friendly. Dual-flush toilets save water by offering two flush options.
- Materials: Porcelain is standard for toilets and sinks due to its durability. Stainless steel is a popular choice for kitchen sinks, while cast iron tubs retain heat well but are very heavy.
Water-efficient fixtures can reduce household water use by up to 30%. Look for low-flow toilets and aerated faucets that deliver great performance while saving money. For more details, you can find more about water-efficient faucets from the EPA. Smart faucets with touchless operation are also gaining popularity.
Always verify compatibility before you buy to avoid turning a simple project into a complex one.
Understanding Plumbing Codes and Safety
Following safety procedures and understanding basic plumbing codes are essential for a successful plumbing fixture installation.
Safety First:
- Shut off the water. Use the shut-off valves under the fixture or the main water supply for your house. Open the faucet to drain any remaining water.
- Use personal protective equipment (PPE). Wear safety glasses and gloves.
- Ensure good ventilation when working with sealants.
- Turn off electricity at the circuit breaker if your project involves electrical components like a garbage disposal or smart faucet.
Plumbing Codes: Most areas follow a version of the Uniform Plumbing Code (UPC) or International Plumbing Code. These codes ensure your plumbing is safe and functional. Key principles include:
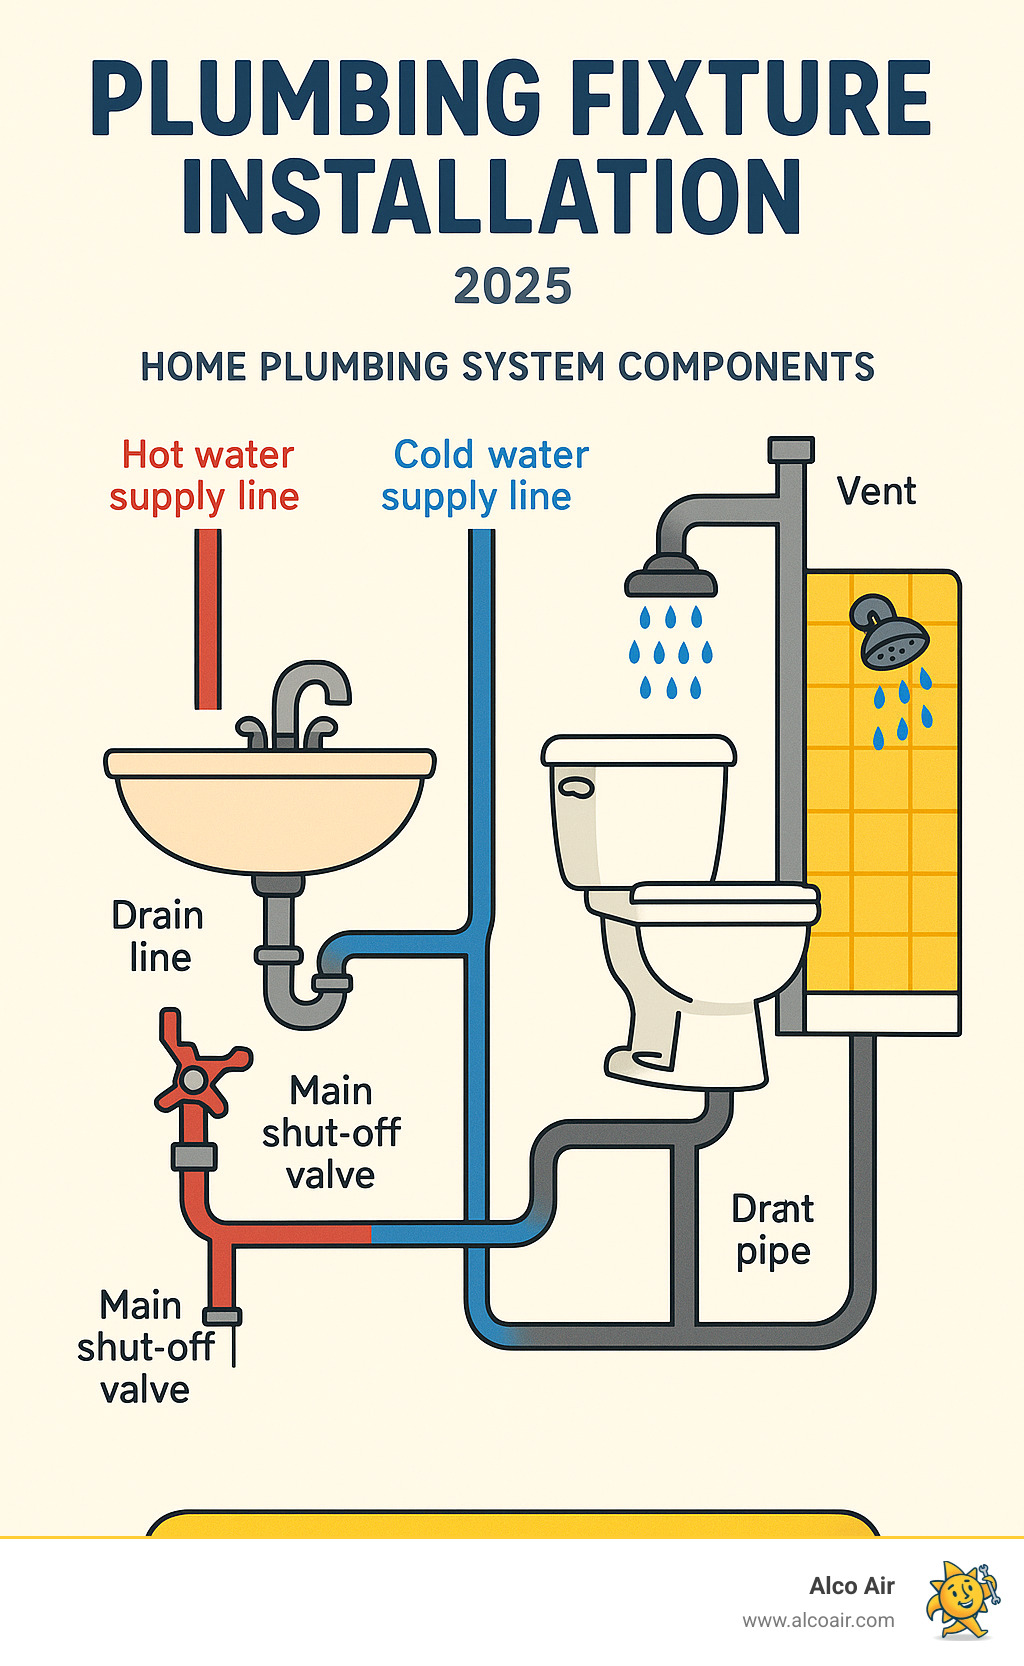
- P-traps: The curved pipe under every sink holds water to block sewer gases from entering your home.
- Vent Pipes: These pipes allow air into the drainage system so water flows out properly.
While you don’t need to be an expert, understanding these basics helps ensure your installation meets standards. For major modifications, consulting a professional is wise.
The Ultimate Guide to Plumbing Fixture Installation
Now that you’re prepared, let’s walk through the installation process for the most common home fixtures. This guide will help you tackle your plumbing fixture installation with confidence.
How to Install a Bathroom or Kitchen Faucet
Replacing a faucet is a great DIY project that can instantly update the look of your sink.
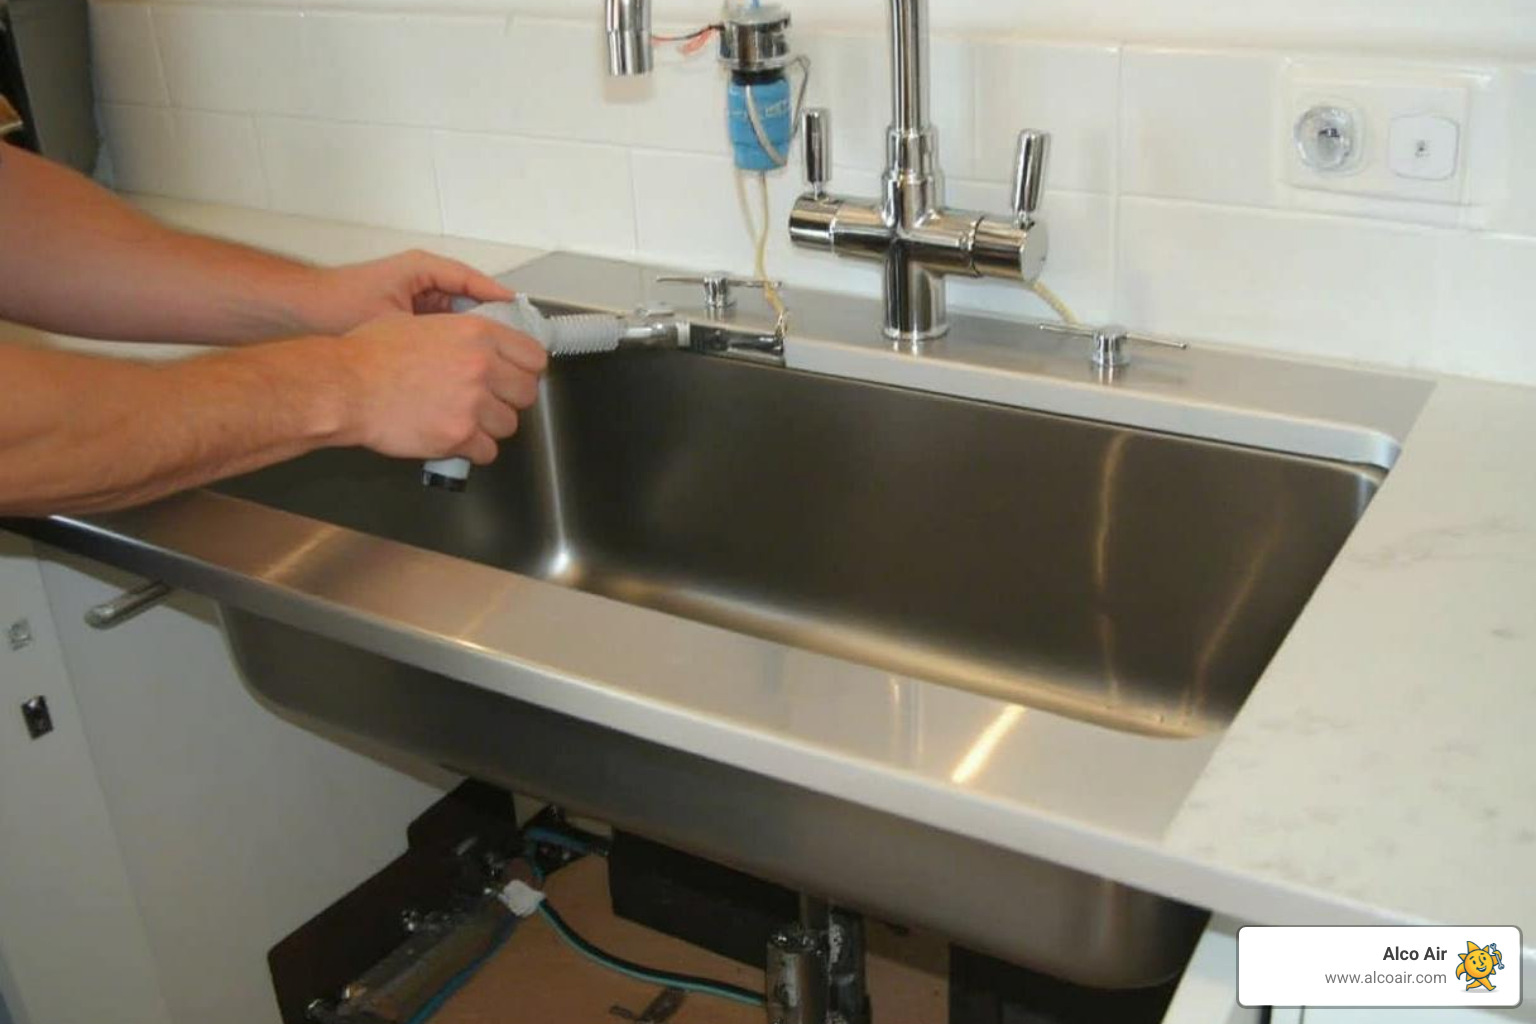
- Remove the Old Faucet: Turn off the water at the shut-off valves and open the faucet to drain the lines. Place a bucket underneath to catch drips. Use an adjustable or basin wrench to disconnect the water supply lines and remove the mounting nuts holding the old faucet. Lift the old faucet out.
- Clean the Surface: Scrape away any old plumber’s putty or caulk from the sink surface to ensure a clean, smooth area for a watertight seal.
- Install the New Faucet: If your faucet uses a deck plate, apply a bead of silicone caulk or plumber’s putty to its underside before positioning it. Insert the new faucet’s supply lines and mounting shanks through the holes. From underneath, hand-tighten the mounting nuts, check that the faucet is straight, then snug them with a basin wrench. Do not overtighten.
- Connect Supply Lines: Attach the new supply lines to the faucet inlets and the shut-off valves. Hand-tighten first, then give them a quarter-turn with a wrench. Use Teflon tape on any threaded connections that don’t have a rubber washer.
- Install the Drain Pop-Up: Follow the manufacturer’s instructions to assemble the drain. Apply plumber’s putty or silicone to the flange inside the sink, insert the drain body, and tighten the locking nut from underneath. Reconnect the P-trap and assemble the pop-up stopper mechanism.
- Test for Leaks: Slowly turn the water back on. Check all connections for drips. Run both hot and cold water and fill the sink to test the drain. Gently tighten any leaking connections.
How to Install a Toilet
Installing a toilet is a manageable plumbing fixture installation that requires careful preparation and execution.
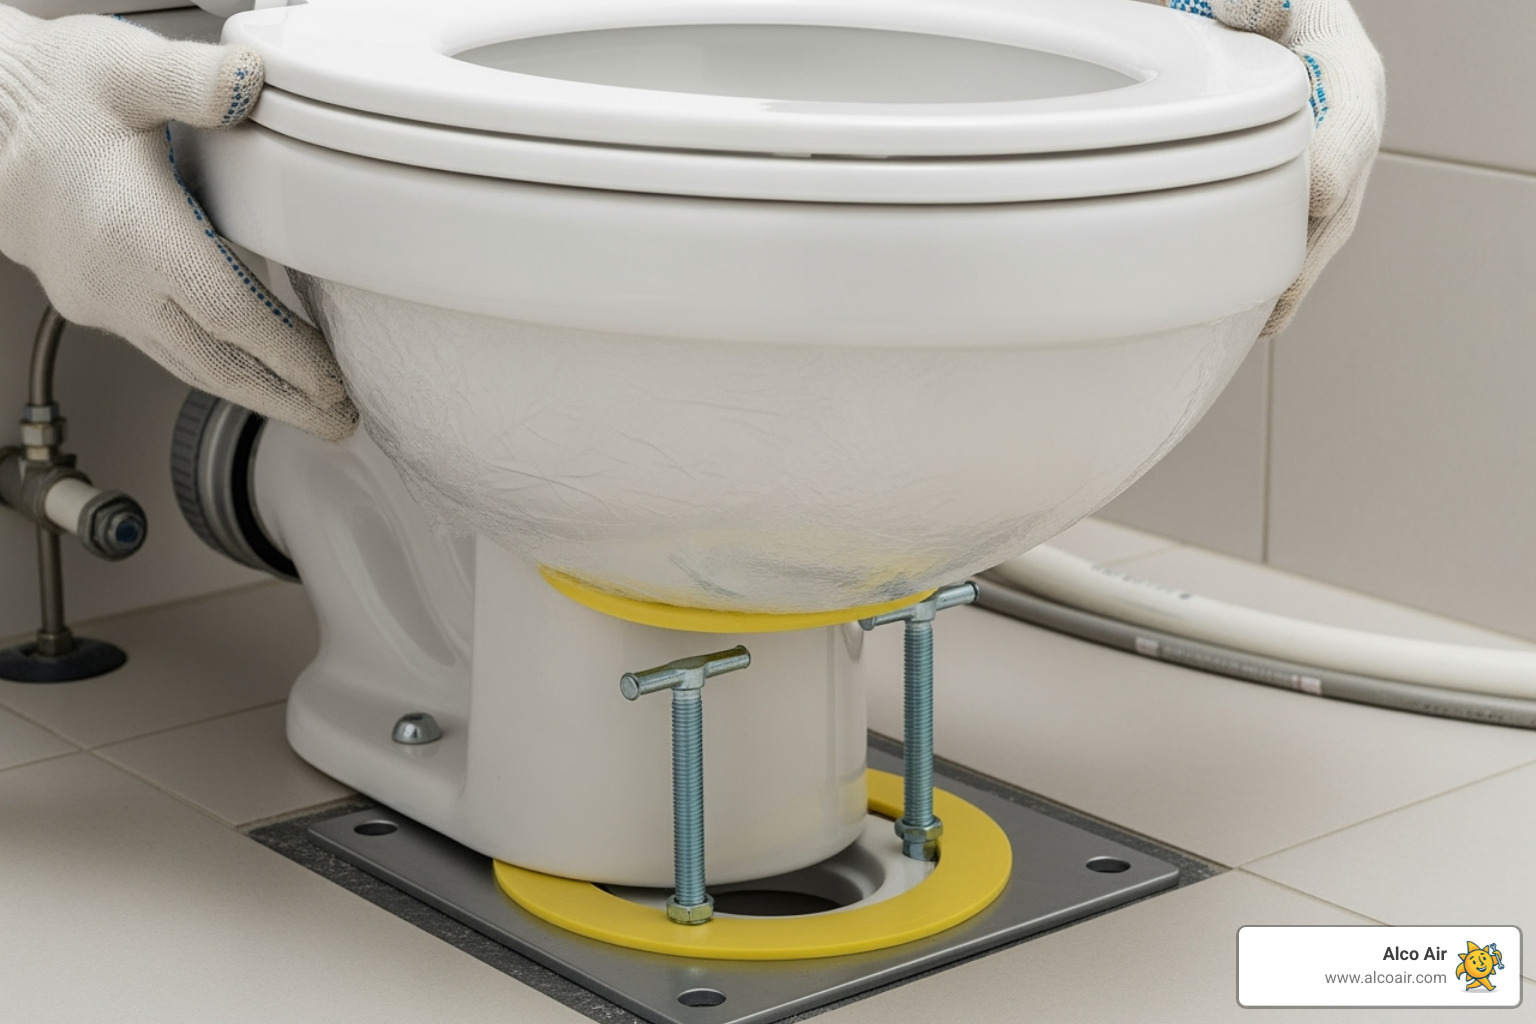
- Prepare the Site: Turn off the water supply, flush the toilet to empty it, and disconnect the supply line. Unbolt the toilet from the floor, rock it gently to break the wax seal, and remove it. Scrape all old wax from the closet flange (the pipe on the floor) and inspect it for damage. Insert new flange bolts.
- Install the Wax Ring: A new wax ring is essential. Press it firmly onto the closet flange or the outlet on the bottom of the toilet.
- Set the New Toilet: Carefully lift the toilet bowl, align the holes in its base with the flange bolts, and lower it straight down. Press down firmly, rocking slightly, to compress the wax ring and create a solid seal.
- Secure the Toilet: Place washers and nuts on the bolts. Tighten them alternately and evenly until the toilet is stable. Do not overtighten, as this can crack the porcelain. Snap on the decorative bolt caps.
- Connect the Tank: For a two-piece toilet, attach the tank to the bowl according to the instructions, ensuring the large gasket is seated correctly. Connect the water supply line to the fill valve on the bottom of the tank.
- Test and Seal: Slowly turn the water on and let the tank fill. Flush several times, checking for leaks at the base and supply line. You can apply a bead of silicone caulk around the base where it meets the floor, leaving a small gap at the back to allow any future leaks to be visible.
How to Install a Showerhead and Tub Faucet
Upgrading a showerhead or tub faucet is a quick way to improve your bathroom.
- Remove Old Fixtures: Turn off the water supply. Unscrew the old showerhead from the shower arm. For a tub spout or valve trim, remove any set screws holding them in place and pull them off.
- Install New Showerhead: Wrap the threads of the shower arm with Teflon tape (3-4 wraps, clockwise). Screw the new showerhead on hand-tight, then use a wrench with a cloth to give it a final snug turn.
- Install New Tub Spout: For a threaded spout, apply Teflon tape to the pipe and screw the new spout on until it’s snug and facing down. For a slip-on spout, slide it over the pipe and tighten the set screw underneath. Apply a small bead of silicone caulk where the spout meets the wall.
- Install New Shower Valve Trim: Check that your new trim kit is compatible with the existing shower valve. If it is, slide on any sleeves and secure the new trim plate and handle per the manufacturer’s instructions. Apply a thin bead of silicone caulk around the edge of the trim plate.
- Test Your Work: Slowly turn the water back on and check all new fixtures for leaks. Periodically clean your showerhead to prevent mineral buildup.
DIY vs. Calling a Pro: Knowing Your Limits
While mastering plumbing fixture installation is empowering, it’s crucial to know when to call a professional. Recognizing your limits ensures the job is done safely and correctly, protecting your home from potential water damage.
Common Issues During Plumbing Fixture Installation
Even with careful preparation, you might encounter issues. Here are some common problems:
- Leaks: The most frequent issue, often caused by under-tightened connections, insufficient sealant, or overtightening, which can damage threads or washers.
- Cross-threading: Screwing a connection on at an angle can damage the threads, causing a persistent leak. Always start by hand-tightening to ensure proper alignment.
- Incorrect Alignment: A crooked faucet or wobbly toilet is not only an eyesore but can also lead to failed seals and leaks.
- Low Water Pressure: This could be due to a kinked supply line, debris in the aerator, or a partially closed shut-off valve.
- Unexpected Pipe Issues: Older homes may have corroded pipes or incompatible materials that complicate a simple replacement.
This table can help you decide whether to DIY or hire a pro:
| Factor | DIY Installation | Professional Installation |
|---|---|---|
| Cost | Saves labor costs; only pays for materials. | Higher upfront cost, but includes labor and expertise. |
| Time | Can take longer, especially for beginners; learning curve. | Faster, efficient completion by experienced technicians. |
| Complexity | Best for straightforward replacements. | Handles complex issues, major modifications, and unexpected problems. |
| Warranty | No labor warranty; manufacturer warranty on fixture only. | Often comes with a labor warranty on the installation. |
| Risk | Higher risk of leaks, damage, and code violations. | Lower risk; licensed pros know codes and best practices. |
| Tools | Requires purchasing or renting specialized tools. | Plumbers bring all necessary specialized tools. |
| Expertise | Relies on self-education and problem-solving. | Benefits from years of training and hands-on experience. |
Signs You Need a Professional Plumber
Sometimes, the best approach to plumbing fixture installation is to call for help. Here are clear signs you should contact a professional:
- Persistent Leaks: If you’ve tried basic troubleshooting and a leak won’t stop, a pro can diagnose and fix the root cause.
- Major Pipe Modifications: Any job that requires rerouting pipes, changing pipe sizes, or cutting into walls or floors is best left to an expert.
- Hidden Leaks: If you suspect a leak behind a wall or under the foundation (a slab leak), you’ll need specialized equipment for detection and repair.
- Complex Fixtures: Intricate systems like some bidets or commercial-grade fixtures often require professional installation.
- Lack of Tools or Experience: If you don’t have the right tools or feel uncertain about the project, hiring a pro ensures it’s done safely and correctly.
- Code Compliance: To guarantee your installation meets local plumbing codes, especially for larger projects, a licensed plumber is your best bet.
- Existing Water Damage: If you uncover stains, mold, or rot when removing an old fixture, a professional should assess the damage before you proceed.
Frequently Asked Questions about Fixture Installation
Here are answers to some of the most common questions we hear about plumbing fixture installation.
How long does it take to install a plumbing fixture?
The time required for a plumbing fixture installation varies based on the fixture, your experience level, and any unexpected issues. Here are some general estimates for a DIYer:
- Sink Faucet: 1-3 hours. Working in tight spaces under the sink can be time-consuming.
- Toilet: 2-4 hours. This involves heavy lifting and careful sealing.
- Showerhead: 15-30 minutes. This is typically a very quick and easy swap.
- Shower Valve: 4+ hours. Replacing the valve behind the wall is a complex job that can take half a day or more and often requires a professional.
Always allow for extra time in case you run into corroded pipes or stripped screws.
Can I install any new fixture with my old plumbing?
Often, yes, but compatibility is the most important factor in any plumbing fixture installation. Here’s what to check:
- Faucets and Sinks: Most modern faucets fit standard sinks, but you must match the faucet type (single-hole, widespread) to your sink’s hole configuration. A deck plate can sometimes be used to cover extra holes.
- Toilets: The key measurement is the ‘rough-in’—the distance from the wall to the center of the drain pipe. The U.S. standard is 12 inches. Measure yours before buying a new toilet.
- Shower and Tub Valves: New trim kits (handles, plates) are often designed for specific valve bodies. If your new trim doesn’t fit your old valve, you may need to replace the entire valve, which is a much larger job.
For major changes or in very old homes, a professional assessment is a smart move to ensure everything will work together correctly.
What’s the most common mistake in a DIY plumbing installation?
When it comes to DIY plumbing fixture installation, two mistakes stand out as the most common and problematic:
-
Overtightening Connections: It’s tempting to tighten fittings as much as possible, but this is a major error. Excessive force can strip threads, crack porcelain on a toilet or sink, or damage plastic parts and rubber seals. This often leads to leaks that are difficult to fix. The correct method is to hand-tighten first, then use a wrench for a final quarter- to half-turn.
-
Improper Sealing: A poor seal will cause slow leaks that can lead to significant water damage over time. This can happen from not using enough plumber’s putty or silicone, failing to clean the surface before applying sealant, or reusing an old wax ring on a toilet. Always use fresh sealant and a new wax ring, and ensure the surfaces are clean and dry.
And a classic beginner’s mistake is forgetting to turn off the water supply before starting, which can quickly lead to a major mess.
Conclusion: Your Flawless Fixture Finish
You’ve journeyed through the ins and outs of plumbing fixture installation, from gathering tools like an adjustable wrench and plumber’s putty to learning the steps for installing a new faucet, toilet, or showerhead. The satisfaction of completing a home improvement project yourself is immense, empowering you to take control of your home’s maintenance.
However, as we’ve explored, it’s just as important to know your limits. Sometimes, a project involves unexpected pipe modifications, a stubborn leak, or a complex fixture that is best left to a professional. There is no shame in calling for help; in fact, it’s a smart decision that guarantees the job is done right.
For those moments when you need an expert touch, or for any complex plumbing fixture installation where you want guaranteed results, our team at Alco Air is ready to help. With over 30 years of experience and NATE-certified technicians, we ensure your new fixtures are installed safely, correctly, and up to code, taking the stress out of the equation.
Ready to enjoy your perfectly installed fixtures without lifting a finger? Trust the experts who’ve been serving our community for decades. Schedule your professional plumbing installation in Flint, TX today!


